The Ultimate Guide to Reverse Searing: Perfecting Your Steak Every Time
The Ultimate Guide to Reverse Searing: Perfecting Your Steak Every Time
- What is Reverse Searing?
- Why Choose Reverse Searing?
The Science Behind Reverse Searing
- How Reverse Searing Works
- Benefits of Low-Temperature Cooking
How to Reverse Sear a Steak: Step-by-Step
- Step 1: Choose the Right Cut
- Step 2: Season the Steak
- Step 3: Slow Cook the Steak
- Preparing the Oven
- Monitoring Internal Temperature
- Step 4: Prepare for Searing
- Resting the Steak
- Heating Your Pan or Grill
- Step 5: Sear the Steak
- Techniques for a Perfect Sear
- Using the Right Oil
- Step 6: Rest and Serve
- Importance of Resting
- Slicing and Serving Tips
Tips for the Perfect Reverse Sear
- Use a Meat Thermometer
- Don’t Rush the Sear
- Experiment with Seasonings
Troubleshooting Common Issues
- Uneven Cooking
- Overcooked Edges
- Lack of Crust
Cooking a steak to perfection is a culinary challenge many aspire to conquer. While traditional methods like pan-searing or grilling have their merits, the reverse sear technique has gained significant popularity among home cooks and professional chefs alike. This method promises a more evenly cooked steak with a deliciously crisp crust. In this blog post, we'll demystify the reverse sear technique, exploring its benefits, step-by-step process, and tips for achieving steak perfection.
What is Reverse Searing?
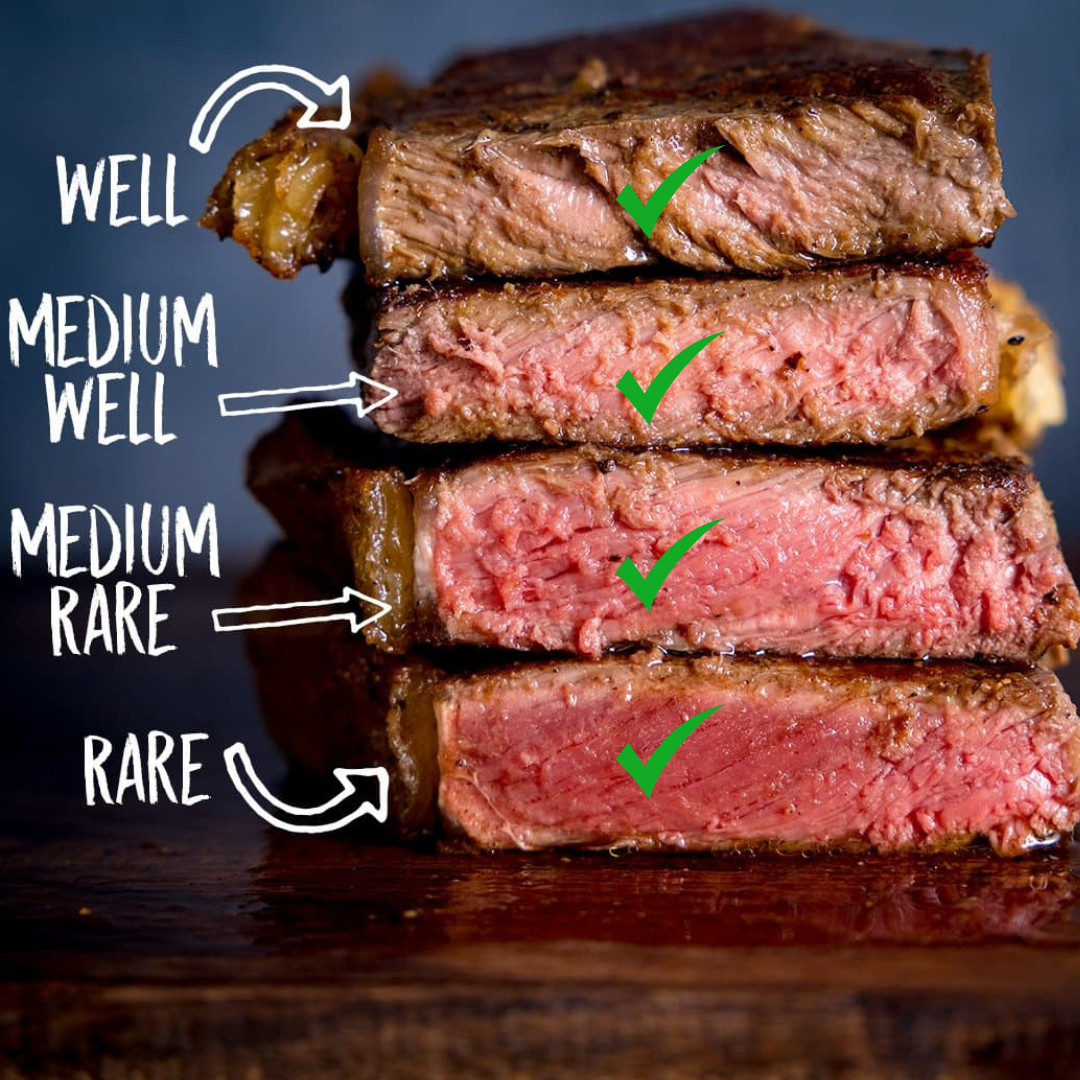
Reverse searing is a cooking method that involves cooking the steak slowly at a low temperature before finishing it with a high-heat sear. Unlike traditional searing, where the steak is first browned in a hot pan and then cooked to the desired doneness, reverse searing flips this approach. The steak is first cooked slowly, often in an oven, and then seared quickly in a hot pan or on a grill. This technique allows for greater control over the final doneness and texture of the steak.
Why Choose Reverse Searing?
🔥 Even Cooking: By starting with a low and slow cooking process, the steak cooks more evenly from edge to edge. This reduces the risk of overcooking the outer layers while trying to get the center to the perfect temperature.
🍖 Enhanced Flavor: The final sear adds a delicious caramelized crust to the steak, enhancing the overall flavor. The Maillard reaction, responsible for browning, happens during this searing step, giving the steak that sought-after taste and texture.
🎯 Better Control: Reverse searing provides better control over the final doneness of the steak. The initial slow cooking phase allows you to monitor the internal temperature closely, reducing the chances of overcooking.
How to Reverse Sear a Steak: Step-by-Step
- Choose the Right Cut: While reverse searing works with most cuts of steak, thicker cuts like ribeye, New York strip, and tenderloin are particularly suited for this technique.
- Season the Steak: Generously season your steak with salt and pepper. You can also use additional spices or herbs according to your preference.
- Slow Cook the Steak: Preheat your oven to 225°F (107°C). Place the steak on a wire rack set over a baking sheet to allow air circulation around the meat. Cook the steak in the oven until it reaches about 10-15°F (5-8°C) below your desired final temperature. This usually takes around 20-40 minutes, depending on the thickness of the steak.
- Prepare for Searing: Once the steak is close to the desired internal temperature, remove it from the oven and let it rest while you heat your pan or grill.
- Sear the Steak: Heat a skillet or grill over high heat until it’s smoking hot. Add a small amount of oil with a high smoke point, such as canola or vegetable oil. Sear the steak for 1-2 minutes per side, or until a rich, brown crust forms.
- Rest and Serve: After searing, let the steak rest for a few minutes to allow the juices to redistribute. This step ensures that the steak remains juicy and tender.
Tips for the Perfect Reverse Sear
📏 Use a Meat Thermometer: To ensure accurate cooking, use a meat thermometer to monitor the steak’s internal temperature throughout the process.
⏳ Don’t Rush the Sear: Allow your pan or grill to reach the highest temperature possible for a better crust.
🌿 Experiment with Seasonings: Feel free to experiment with different seasoning blends or marinades to find your perfect flavor profile.

